 |
This page details how I converted a beat up
Donkey Kong
arcade cabinet into a Mame based arcade
system (and also how I fixed up the cabinet to look more presentable...).
 |
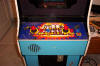
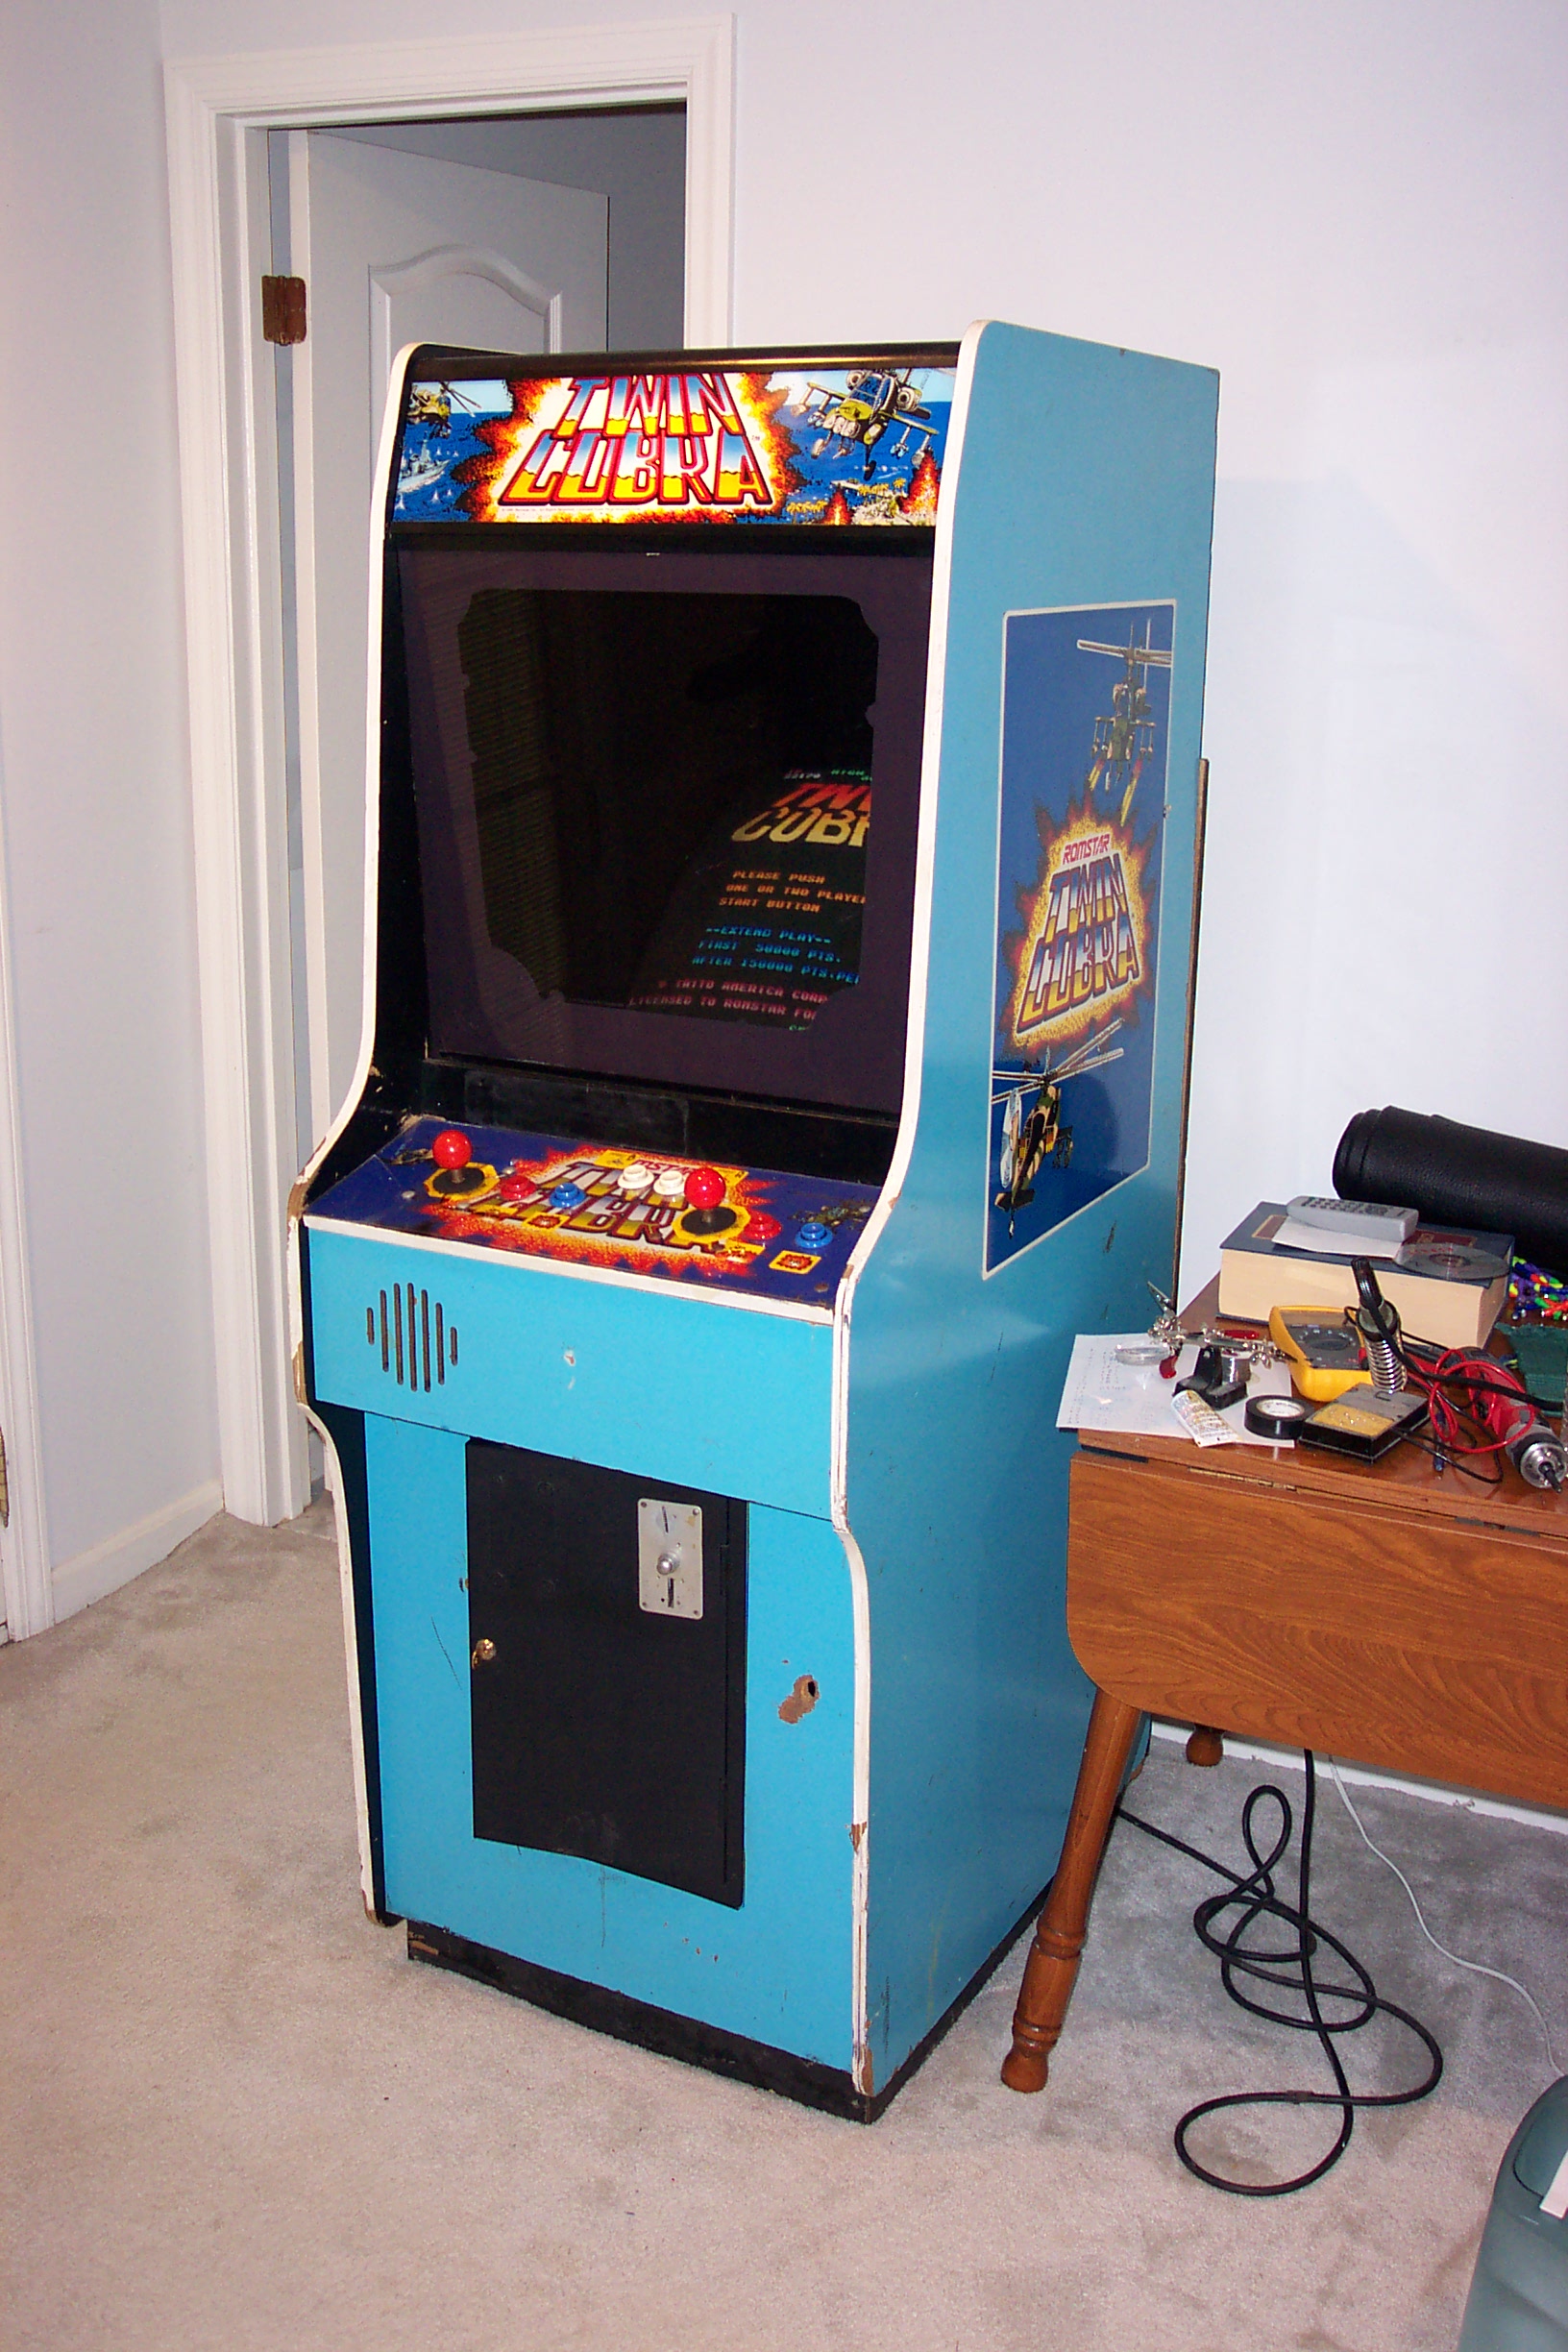
Here's a couple pictures of the cabinet that I won on
EBay on 17Mar05 for $233.25:

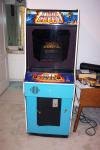 As you can see, original Donkey Kong cabinet (circa 1984) had been converted
to Twin Cobra
with a
conversion kit (probably circa 1988). I think it used to be in a
bar, because it has a distinct cigarette ashtray smell to it.
As you can see, original Donkey Kong cabinet (circa 1984) had been converted
to Twin Cobra
with a
conversion kit (probably circa 1988). I think it used to be in a
bar, because it has a distinct cigarette ashtray smell to it.
|
|
The cabinet is in fair condition. The t-molding is
missing in a few places and there are a few holes and chips in the wood
exterior. The monitor looks good, after you look at it for a while,
you notice that the center of the screen seems to have a large rectangle
burned into it. (Perhaps this was from the high score list of Donkey Kong?)
The control panel needs work because the Plexiglas is cracked and some dark
liquid got in. For some reason, player #1 is on the right side!
(This needs fixing ASAP). The coin door supposedly works, but I
haven't tried it with actual quarters yet. The sound seems to work
perfectly. The buttons and joysticks seem to work good, but the
joystick seems to stick sometimes (this could just be the game though,
because I'm not too familiar with it...).
|
|
The great thing about this cabinet is that it is small
compared to many others. This allows me to keep it in the house
without too much grief from my wife! Also, that it was converted to
Twin Cobra is a good thing because it now has a JAMMA interface board.
This makes connecting it to a PC much easier. Also, the control panel
is easily removable on this cabinet, opening up the possibility of having a
few different panels that can be hot-swapped.
|
|
|
Facade
|
The basic plan is to paint the exterior black (mostly
because it will match the room better), rework the control panel, and
connect to a PC using the JAMMA interface.
|
|
First thing was to find black t-molding (9/16" wide) to
replace the original white stuff. After some searching, I finally
found it at www.t-mold.com. I
ordered one 25' piece on 18Mar05 (This was plenty). Total cost
(including shipping) was $16.54.
|
|
|
Control Panel
|
The really nice thing about this cabinet is that the
control panel is removable. I'm taking advantage of this to make a few
different control panels for various games... The one that came with
it is not bad for games that need one or two 8-way joysticks. But,
it's not so good for 4-way joystick games, so I've made a new control panel.
I may make another with a spinner and a trackball.
|
|
Getting at the control panel is really easy on this
cabinet... There are two latches on either side that hold it and these
can be reached through the coin door. The first thing I did was to
insert two DB-25 connectors (1 male, 1 female) on the wire bundle going to
the control panel. This allows me to have multiple control panels that
can be hot-swapped. The control panel is very basic, just a piece of
wood with a Plexiglas cover.
 Here's a look at the DB-25 modification:
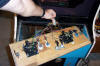 This is my wiring chart:
| Pin# |
Signal |
Color |
|
Pin# |
Signal |
Color |
| 1 |
Ground |
Black |
|
14 |
2 Start |
Grey |
| 2 |
1 Start |
Grey |
|
15 |
2 Up |
Pink |
| 3 |
1 Up |
Pink |
|
16 |
2 Down |
Blue |
| 4 |
1 Down |
Blue |
|
17 |
2 Left |
Green |
| 5 |
1 Left |
Green |
|
18 |
2 Right |
Yellow |
| 6 |
1 Right |
Yellow |
|
19 |
2 B1 |
Orange |
| 7 |
1 B1 |
Orange |
|
20 |
2 B2 |
Red |
| 8 |
1 B2 |
Red |
|
21 |
|
|
| 9 |
|
|
|
22 |
|
|
| 10 |
|
|
|
23 |
|
|
| 11 |
|
|
|
24 |
|
|
| 12 |
|
|
|
25 |
|
|
| 13 |
|
|
|
|
|
|
|
|
As you can see, there is room for more wires on the connector, should
the need arise. I also used this opportunity to swap wires, so that
player #1 is on the left.
|
|
|
Computer Hardware
|
Of course, I happen to have an old motherboard (or two) around...
This one should be good enough:
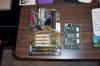 It's a noname BX31 based Pentium2 motherboard with a 600MHz pentium3 socket
370 CPU installed using a socket 370 to slot 1 adapter board. It has
192MB of PC100 DIMM memory installed.
It's a noname BX31 based Pentium2 motherboard with a 600MHz pentium3 socket
370 CPU installed using a socket 370 to slot 1 adapter board. It has
192MB of PC100 DIMM memory installed.
|
|
Ok, I've now tried several video cards (AGP, PCI, and ISA) out with mame
and they all work for most games. The problem is that none of them worked
for vector games... After scanning the internet, it seems that I
needed an ATI Rage Pro card for best compatibility (Or, shell out the $90
for an ArcadeVGA card). I was going to buy one off Ebay but then I saw
one at CompUSA (actually it was a generic CompUSA branded box) for $30.
This is an 8MB ATI Rage Pro card with PCI interface. I'm pretty happy
with it as all games now work and most work well in the vertical orientation
also. Only trouble is that I can't get Windows to run interlaced with
this card.
|
|
I'm using the JPAC to interface the computer to the JAMMA interface.
It makes life very simple although I think I could have been able to get by
without it...
|
|
|
Computer Software
|
After looking at a few sites, I decided on Windows98 SE as the OS.
I figured out how to get it to boot just to DOS without starting Windows98
by the info on this
page (editing the hidden msdos.sys file).
|
|
I spent a lot of time trying to get AdvanceMame to work and finally gave
up!
|
|
I finally got it going using just the DOS version of MAME. After a
lot of trial and error, I figured out that I need to use these switches to
get the games to play right on my vertically oriented arcade monitor (note
that I've renamed dmame.exe to mame.exe:
 |
mame galaga -monitor arcade -ror -soundcard 1 -depth 8
|
|
|
After playing around with the "arcadeos.cfg" file a bit, I got
ArcadeOS going. I think I like this front end better that AdvanceMame
(mostly because I can get it to work!).
|
|

 As you can see, original Donkey Kong cabinet (circa 1984) had been converted
to Twin Cobra
with a
conversion kit (probably circa 1988). I think it used to be in a
bar, because it has a distinct cigarette ashtray smell to it.
As you can see, original Donkey Kong cabinet (circa 1984) had been converted
to Twin Cobra
with a
conversion kit (probably circa 1988). I think it used to be in a
bar, because it has a distinct cigarette ashtray smell to it. Here's a look at the DB-25 modification:
 This is my wiring chart:
  It's a noname BX31 based Pentium2 motherboard with a 600MHz pentium3 socket
370 CPU installed using a socket 370 to slot 1 adapter board. It has
192MB of PC100 DIMM memory installed.
It's a noname BX31 based Pentium2 motherboard with a 600MHz pentium3 socket
370 CPU installed using a socket 370 to slot 1 adapter board. It has
192MB of PC100 DIMM memory installed.