|
 |
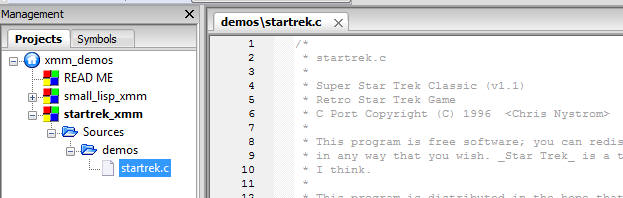
As in the install guide, right-click on "startrek_xmm" project in
the left panel and select "Build Options..." from the pop-up menu (or
use the menu and select "Project->Build Options..." making sure the
startrek_xmm project in this workspace is activated and shows in bold
font in the left panel). |
|
For this example, we'll set all our build options in the "target"
("Release") branch of the tree control in the left pane of the Build
Options menu, instead of the project "startrek_xmm", the root of the
tree control. |
|
But first, select the project build options by selecting "startrek_xmm",
the root of the tree control in the left pane. Unselect everything
there: "libcx", "libm", and "SMALL". |
|
Now, go back to the "Release" branch and select these options:
 |
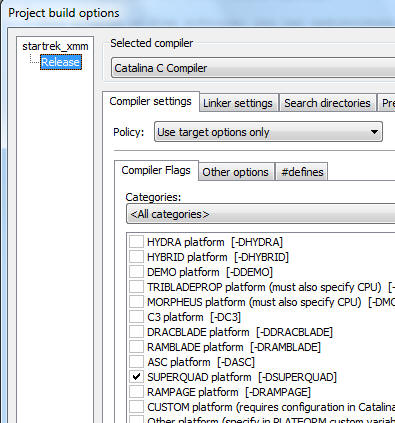
SuperQuad (or RamPage,
depending on which one you have installed) |
|
libcx |
|
libm |
|
SMALL |
|
1K cache |
|
FLASH loader |
|
PC (Serial Terminal)
|
|
Enable automatic CR on
LF (if you are using Propeller Serial Terminal) |
|
Note: In some
cases you might want to use the "Set Memory Size" build option to
warn you if you've exceeded available memory. If you go over
to the "Custom Variables" tab, you'll see the MEM_SIZE variable is
128k, which is not enough for these other build options. So,
if you want to use the "Set Memory Size" build option, you'll need
to increase it to at least 256k.
|
|
|
Also, go up to the "Policy:" drop list and select "Use target options
only". That may help us from making a mistake by ignoring any build
options we may left selected for the project. It should now look like this:
|
|
|
|
|
|
We need to tell Catalina which pins we are using for RamPage or
SuperQuad before we build anything. |
|
Also, if we want to use VGA, TV, keyboard, mouse, or SD card, we have to
tell it about that in these files too. |
|
Unfortunately, the files that come with Catalina are specifically for
the C3 board, which needs a lot of special settings. |
|
So, we'll provide some more streamlined examples here for you to replace
these files with:
|
These files should be in one of these two places, depending on your
Windows version:
|
C:\Program Files (x86)\Catalina\target |
|
C:\Program Files\Catalina\target |
|
|
|
|
These settings are for a typical Propeller Platform or breadboard
setup with:
|
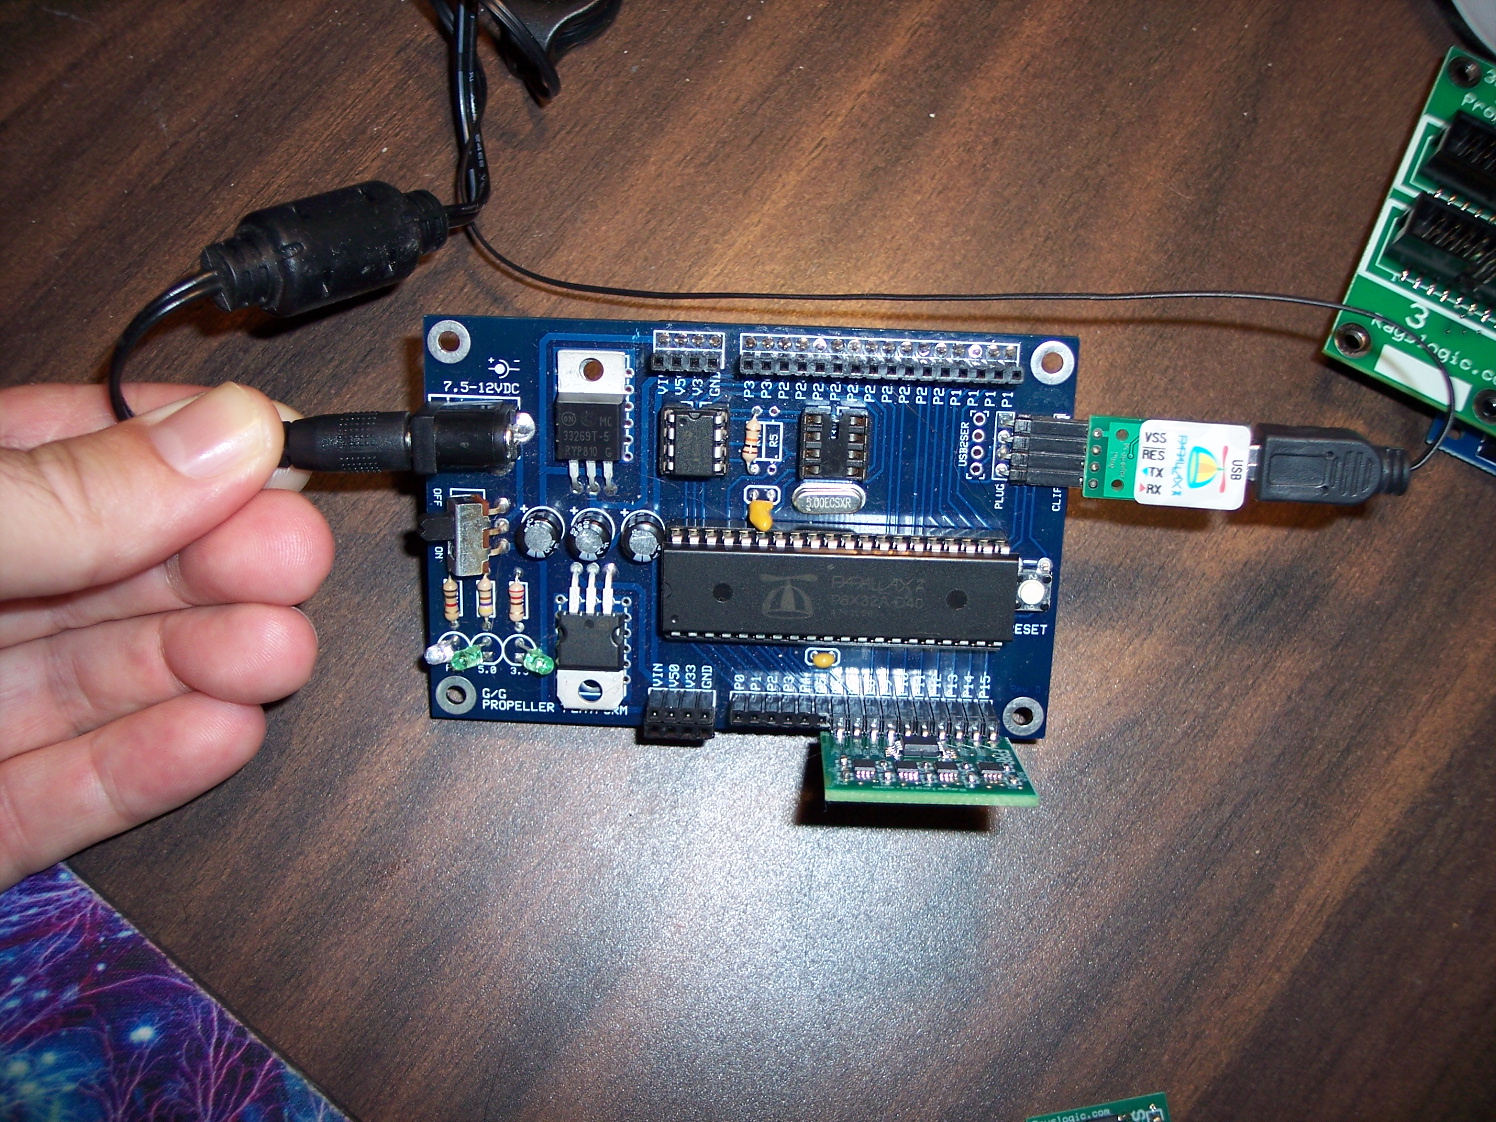
The SuperQuad pins are set here to P8 through P15 with the
Propeller providing power on pins P8 and P15 and SIO0 on P9
|
Here's how I tested these settings with SuperQuad on a
simple Propeller Platform board: |
|
|
|
|
The RamPage pins are set here to P6 through P15 with the
Propeller providing power on P6 and P15 and SIO0 on P8
|
Here's how I tested these settings with RamPage on a simple
Propeller Platform board: |
|

|
|
|
|
These settings are if you just plug the module into the Prop
Platform header and use two Prop pins to provide power |
|
Note that the DEF file also includes settings for VGA, TV, keyboard,
mouse and SD card, but we aren't using them for this example. |
|
|
|
|
Now that we've set our build options, we're ready to compile the code
that will get sent to the Propeller to run. |
|
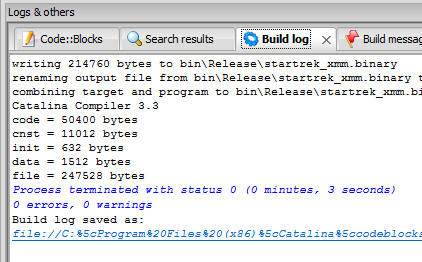
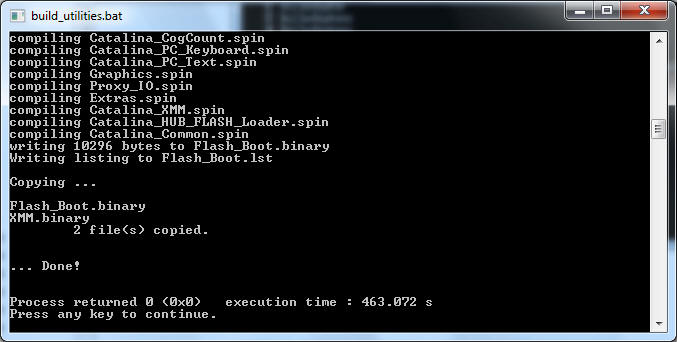
Simply select "Build->Build" from the menu or right-click on the project
and "Build". Look down at the "Build Log" window at the bottom
of CodeBlocks and you should see this when it's done (with SuperQuad as
target):
|
|
|
|
|
|
This step is a little tricky, but if you make a mistake the first time,
no harm done, just do it again... |
|
Here we basically describe the underlying OS that our program will run
under. |
|
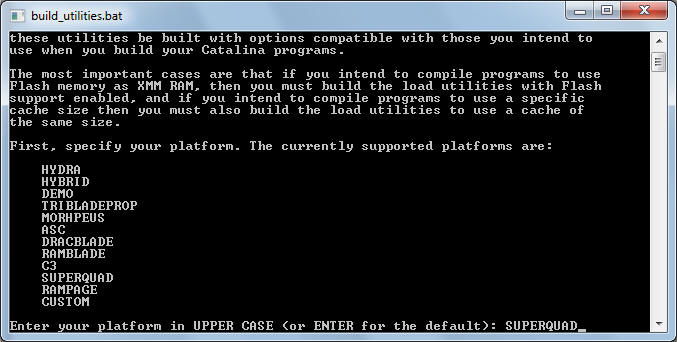
From the CodeBlocks menu, select "Tools->Build XMM Utilities" |
|
A DOS windows should show up like this:
|
|
|
Type in either "SUPERQUAD" or "RAMPAGE", which ever you have,
SuperQuad shown above.
|
Note this program is CASE
SENSITIVE, so be sure to type everything in
UPPER CASE. |
|
|
|
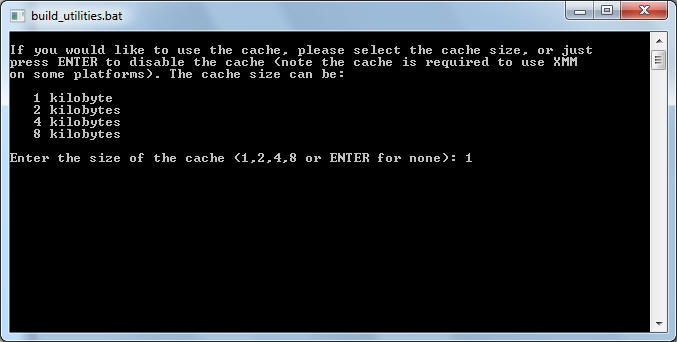
Hit your Enter key to see our cache size options:
|
|
|
Enter in "1" as shown above. |
|
|
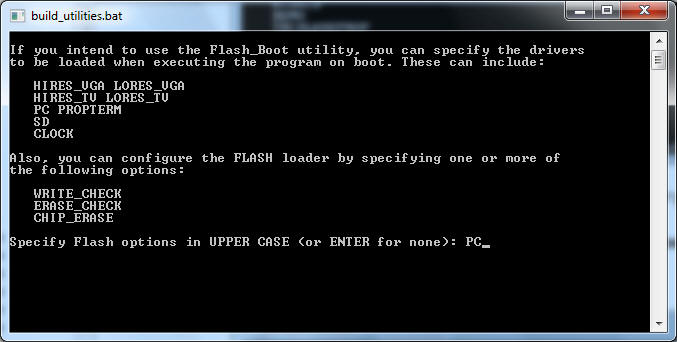
Hit Enter again to see the final options:
|
|
|
For this example, we just need "PC" as shown above. But, you
might want to experiment later with VGA output. If so, you need to
specify "HIRES_VGA" here and also in your project's Build Options.
|
|
|
Hit Enter again to see the result:
|
|
|
Hit enter one last time to close this window. |
|
|
|
|
Now we're all set to download to the Propeller and run the code from our
FlashPoint memory module. |
|
From the CodeBlocks menu, select "Tools->Download to XMM RAM" |
|
Now, you have to be a bit patient because it takes about 60 seconds to
download over the serial connection. If you have a PropPlug, you'll
see the lights flashing during the download. |
|
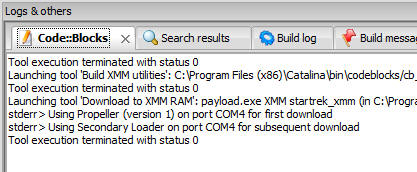
When finished, you should see this at the bottom of CodeBlocks:
|
|
|
Make a note of the COM port above for your setup, you'll need it for
the serial terminal connection. |
|
|
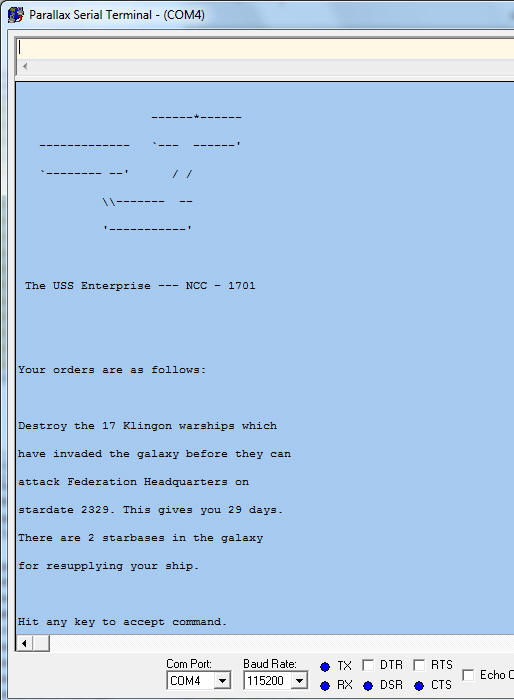
Open up a serial terminal, like the Propeller Serial Terminal (included
with the Propeller Tool) connect at 115200 baud with the serial port
CodeBlocks used to download with (see above).
|
You should see this: |
|
|
|
|
|
Congratulations! You've completed this guide.
|