![]()
![]()
![]()
![]()
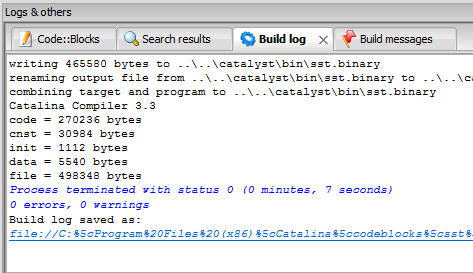
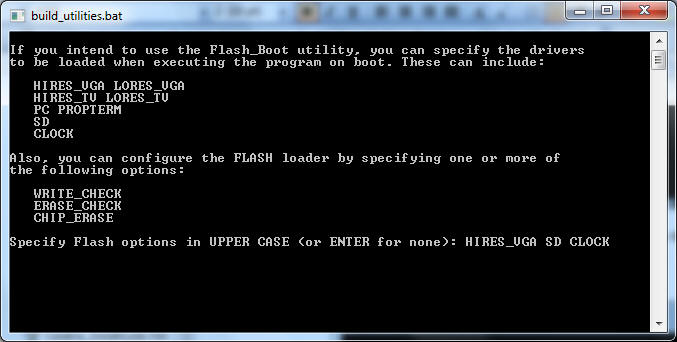
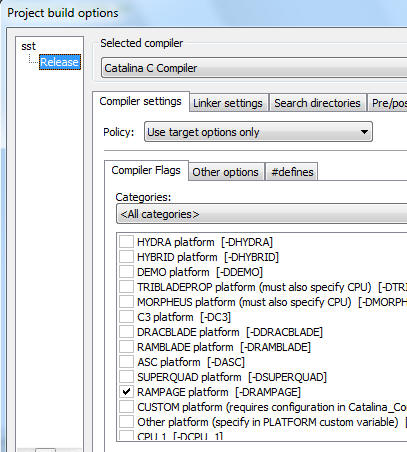
Note: In some
cases you might want to use the "Set Memory Size" build option to
warn you if you've exceeded available memory. If you go over
to the "Custom Variables" tab, you'll see the MEM_SIZE variable is
512k, which is enough for these build options.
SD_DO_PIN = 4'0 ' PIN (FLASHPOINT)
SD_CLK_PIN = 5'1 ' PIN (FLASHPOINT)
SD_DI_PIN = 7'2 ' PIN (FLASHPOINT)
SD_CS_PIN = 6'3
Also, we're using P8..P15 and not using Prop pins to provide power so I've changed these lines:
' RAMPAGE QUAD SPI RAM Definitions (NOTE you also need to set the symbols
' defined below these pin definitions to appropriate values):
'
QSPI_VDD = -1'6 ' PIN (RAMPAGE) - see below to enable
QSPI_CEN = 8'7 ' PIN (RAMPAGE)
QSPI_SCK = 9'8 ' PIN (RAMPAGE)
QSPI_SIO3 = 13'12 ' PIN (RAMPAGE) \
QSPI_SIO2 = 12'11 ' PIN (RAMPAGE) | MUST BE CONTIGUOUS
QSPI_SIO1 = 11'10 ' PIN (RAMPAGE) | (and see below)
QSPI_SIO0 = 10'9 ' PIN (RAMPAGE) /
QSPI_RSCK = 14'13 ' PIN (RAMPAGE)
QSPI_RCEN = 15'14 ' PIN (RAMPAGE)
QSPI_VSS = -1'15 ' PIN (RAMPAGE) - see below to enable
SSPI_SI = QSPI_SIO0 ' PIN (RAMPAGE)
SSPI_SO = QSPI_SIO1 ' PIN (RAMPAGE)
'
'
' Define this to enable applying power to the QSPI_VDD & QSPI_VSS Pins
' (i.e. if they are connected to Propeller pins, and not directly to the
' appropriate power rails):
'
'#define QUAD_POWER_PINS (this line commented out because not using pins for power)